There’s something magical about that first bite of perfectly seared ahi tuna – the contrast between the seasoned crust and the tender, ruby-red center creates an explosion of flavors that never fails to impress. Today, I’m excited to share my favorite recipe for seared ahi tuna paired with a zingy soy ginger lime sauce that’ll transport your taste buds straight to a high-end Asian fusion restaurant.
The Art of Selecting Perfect Ahi Tuna
Before we dive into the cooking process, let’s talk about choosing the right tuna. I’ve learned through years of experience that the quality of your ahi tuna makes or breaks this dish. When I visit my local fish market, I always look for:
- Vibrant red or pink flesh with a firm, smooth texture that springs back when pressed
- A clean, oceanic smell without any strong fishy odors
- Clear patterns in the meat with no brown discoloration
- Sustainably caught certification labels, preferably from MSC (Marine Stewardship Council)
Essential Ingredients
For the Tuna:
- 4 sushi-grade ahi tuna steaks (6 oz each, 1-inch thick)
- 2 tablespoons mixed black and white sesame seeds
- 1 tablespoon high-quality sea salt
- 1 teaspoon freshly ground black pepper
- 2 tablespoons neutral oil (like grapeseed or avocado)
For the Soy Ginger Lime Sauce:
- ¼ cup low-sodium soy sauce
- 2 tablespoons fresh lime juice
- 1 tablespoon grated fresh ginger
- 2 cloves garlic, minced
- 1 tablespoon honey
- 1 teaspoon sesame oil
- 1 small Thai chili, finely minced (optional)
- 1 green onion, finely chopped
Nutritional Information
| Nutrient | Amount per Serving |
|---|---|
| Calories | 285 |
| Protein | 42g |
| Fat | 12g |
| Carbohydrates | 4g |
| Sodium | 820mg |
| Iron | 1.2mg |
| Omega-3 | 1,200mg |
Step-by-Step Preparation Method
Preparing the Sauce
- In a small bowl, I combine the soy sauce and fresh lime juice, whisking them together until well blended
- Next, I add the grated ginger and minced garlic, ensuring they’re evenly distributed
- I drizzle in the honey and sesame oil, continuing to whisk until the honey fully dissolves
- If using, I add the minced Thai chili for an extra kick
- Finally, I fold in the chopped green onions and let the sauce rest for at least 15 minutes to allow the flavors to meld
Preparing the Tuna
- I pat the tuna steaks completely dry with paper towels – this is crucial for achieving that perfect sear
- On a plate, I mix the black and white sesame seeds with salt and pepper
- I gently press each tuna steak into the sesame seed mixture, ensuring even coating on all sides
- In a heavy-bottomed skillet, I heat the neutral oil over high heat until it’s shimmering
- I carefully place the tuna steaks in the hot pan, searing for exactly 45 seconds on each side for rare, or 1 minute for medium-rare
- Using tongs, I briefly sear the edges for about 15 seconds each
Pro Tips from My Kitchen
- Never marinate the tuna before searing – it’ll prevent proper crust formation
- Always bring the tuna to room temperature 30 minutes before cooking
- Use a timer for precise searing – even 15 seconds too long can overcook the tuna
- Let the tuna rest for 5 minutes before slicing against the grain
- Serve the sauce at room temperature for optimal flavor
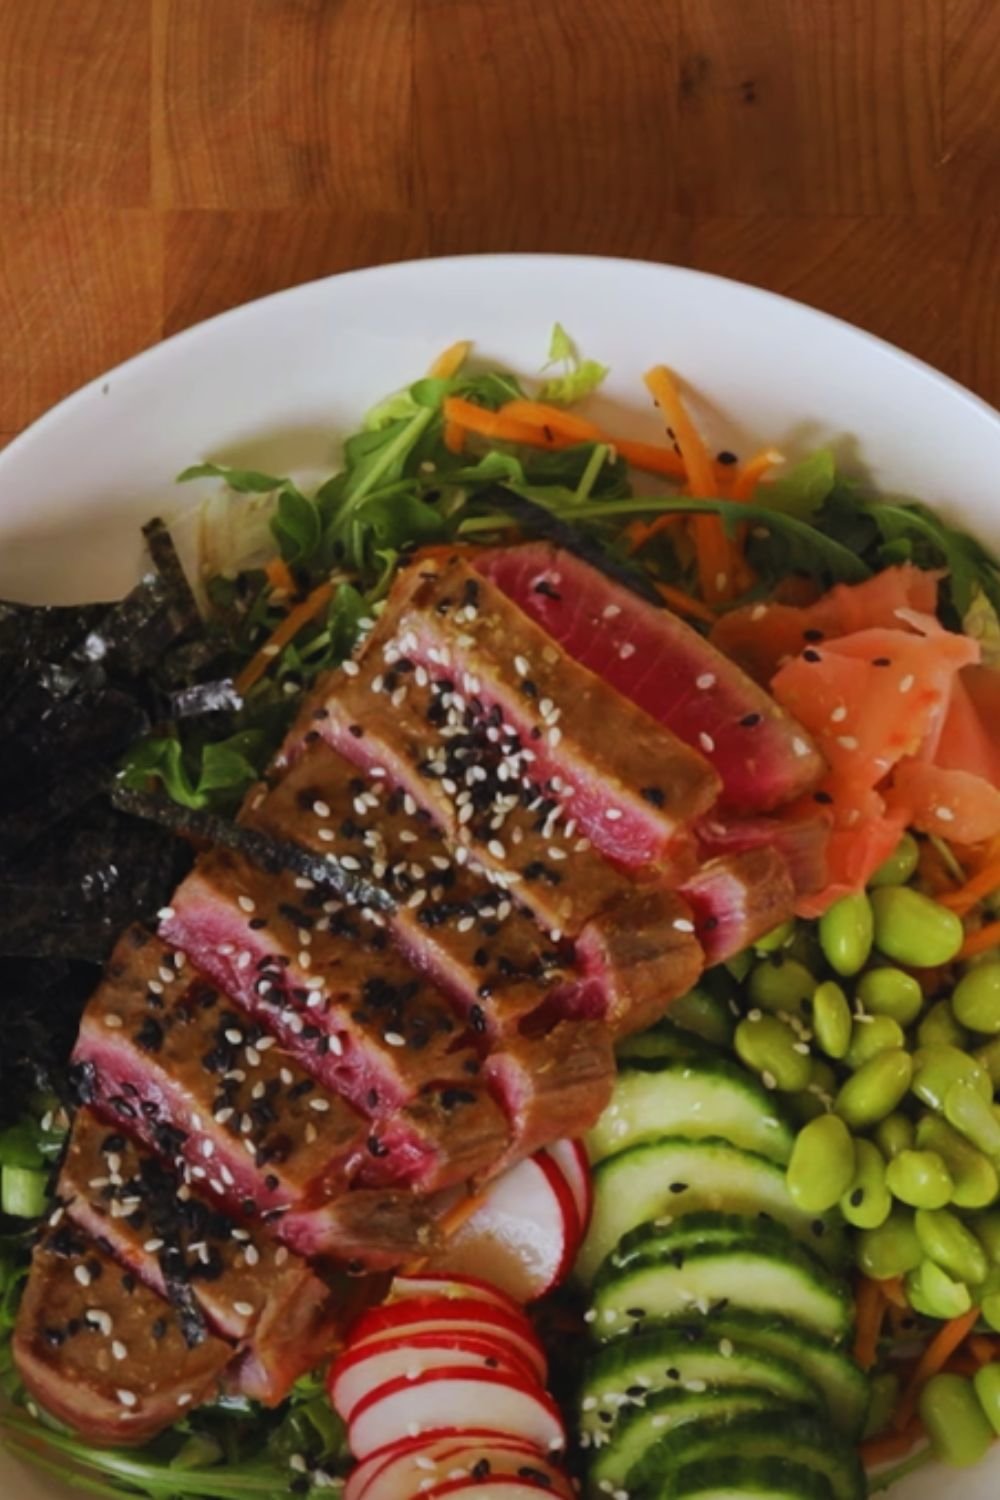
Plating and Presentation

I’ve found that presentation elevates this dish from excellent to extraordinary. Here’s how I plate it:
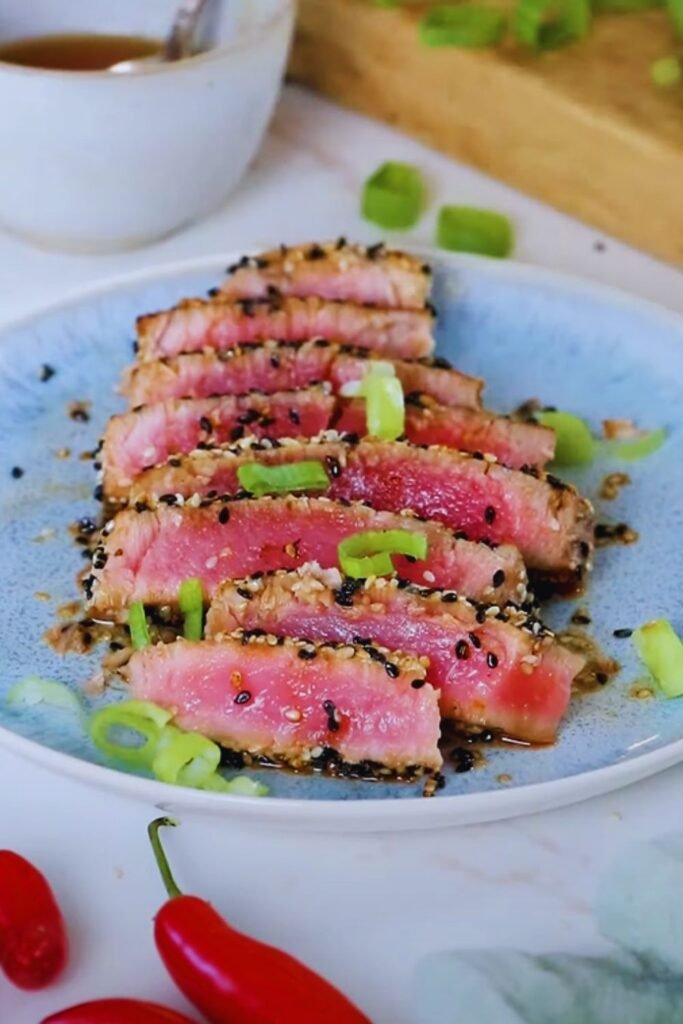
- Slice the tuna against the grain into ½-inch thick pieces
- Arrange the slices in a fan pattern on a dark-colored plate
- Drizzle the soy ginger lime sauce around the tuna, not directly on top
- Garnish with:
- Additional chopped green onions
- Micro greens or cilantro leaves
- A lime wedge
- Extra sesame seeds
- Pickled ginger (optional)
Serving Suggestions
This seared ahi tuna works beautifully when served with:
- Steamed jasmine rice
- Wasabi mashed potatoes
- Asian-inspired slaw
- Cucumber sunomono salad
- Stir-fried baby bok choy
- Grilled asparagus with sesame oil
Storage and Food Safety
- Always consume seared ahi tuna within 24 hours
- Store any leftovers in an airtight container in the refrigerator
- The sauce can be made ahead and stored for up to 3 days
- Never refreeze raw tuna that has been thawed
Common Questions and Answers
Q: Can I use frozen ahi tuna for this recipe?
While fresh is preferred, high-quality frozen ahi tuna can work well. Just ensure it’s completely thawed and patted dry before cooking.
Q: What’s the best oil for searing tuna?
I recommend using oils with high smoke points like grapeseed, avocado, or refined sunflower oil. Avoid olive oil as it can burn at high temperatures.
Q: How do I know if my tuna is sushi-grade?
Look for labels indicating “sushi-grade” or “sashimi-grade” from reputable fishmongers. These designations mean the fish has been frozen at specific temperatures to eliminate parasites.
Q: Can I make this recipe without sesame seeds?
Absolutely! While sesame seeds add texture and flavor, you can simply season the tuna with salt and pepper for a cleaner presentation.
Q: Why is my tuna tough after cooking?
The most common reason is overcooking. Remember that ahi tuna should be treated like a fine steak – the center should remain rare to maintain its tender texture.
Q: How spicy is this recipe?
The basic recipe is mild, but you can adjust the heat level by varying the amount of Thai chili in the sauce or adding wasabi to your plate.
Recipe Variations
While the classic preparation is fantastic, I sometimes enjoy these creative twists:
- Wasabi Crusted: Replace some sesame seeds with wasabi powder
- Citrus Forward: Add orange or yuzu juice to the sauce
- Tropical Twist: Include diced mango in the sauce
- Spice Lover’s: Add togarashi to the crust
- Mediterranean Style: Use za’atar seasoning instead of sesame seeds
Health Benefits
This dish isn’t just delicious – it’s nutritious too! Ahi tuna is:
- Rich in omega-3 fatty acids
- High in lean protein
- Packed with B vitamins
- A good source of selenium
- Low in saturated fat
- Contains important minerals like magnesium and potassium
Remember, this recipe is more than just a meal – it’s an experience. With proper technique and quality ingredients, you’ll create a restaurant-worthy dish that’s sure to impress anyone lucky enough to share your table.