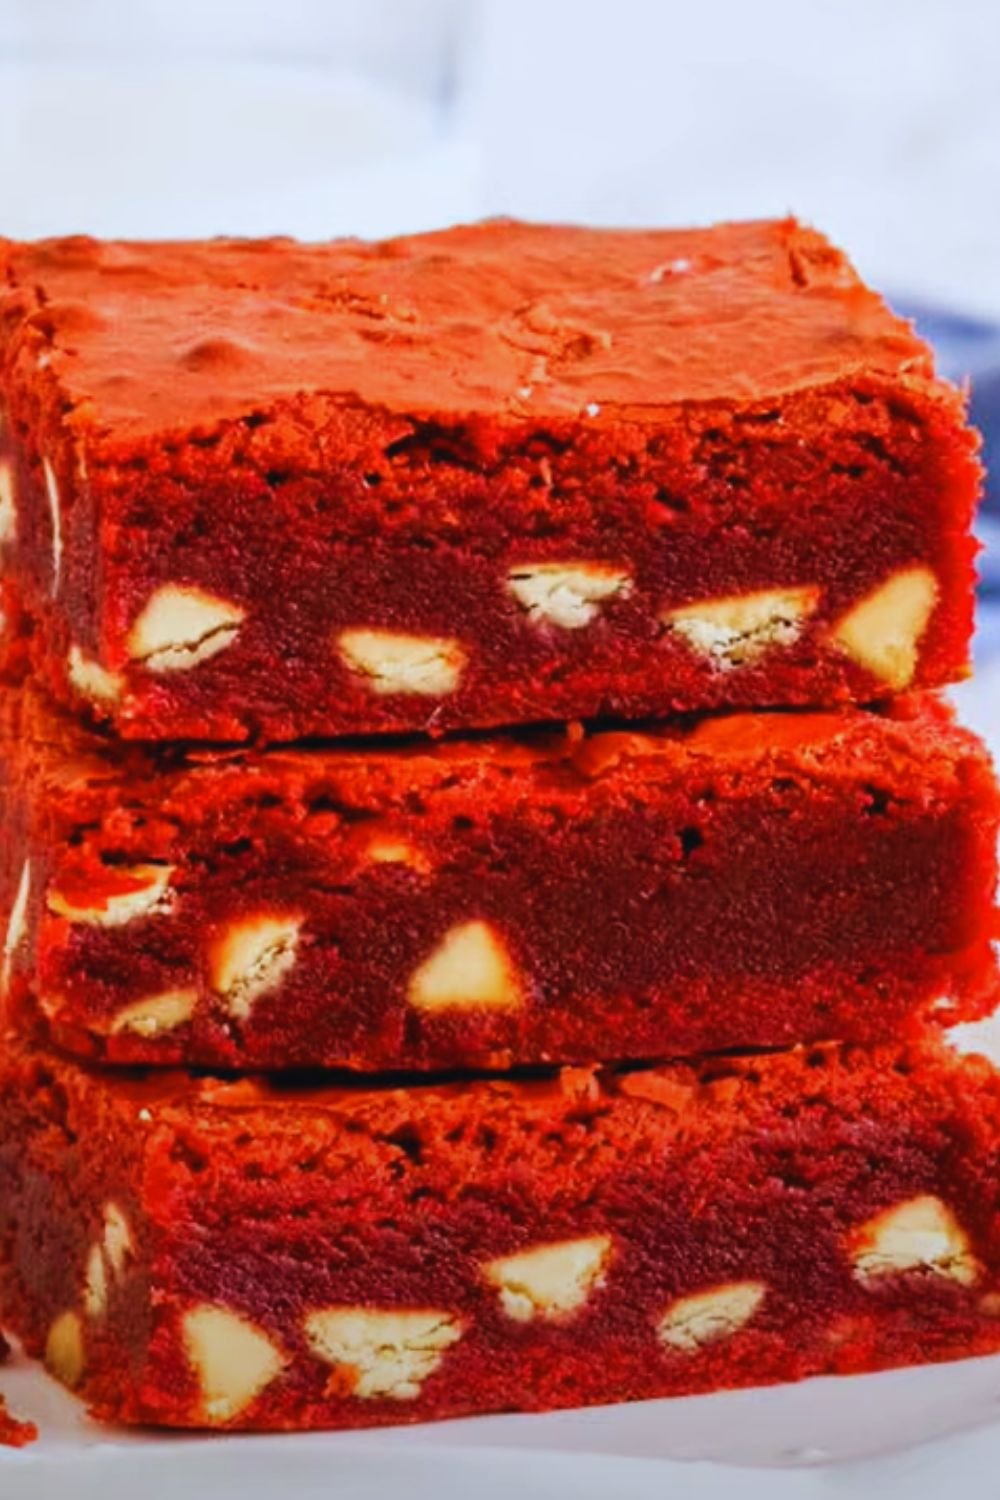
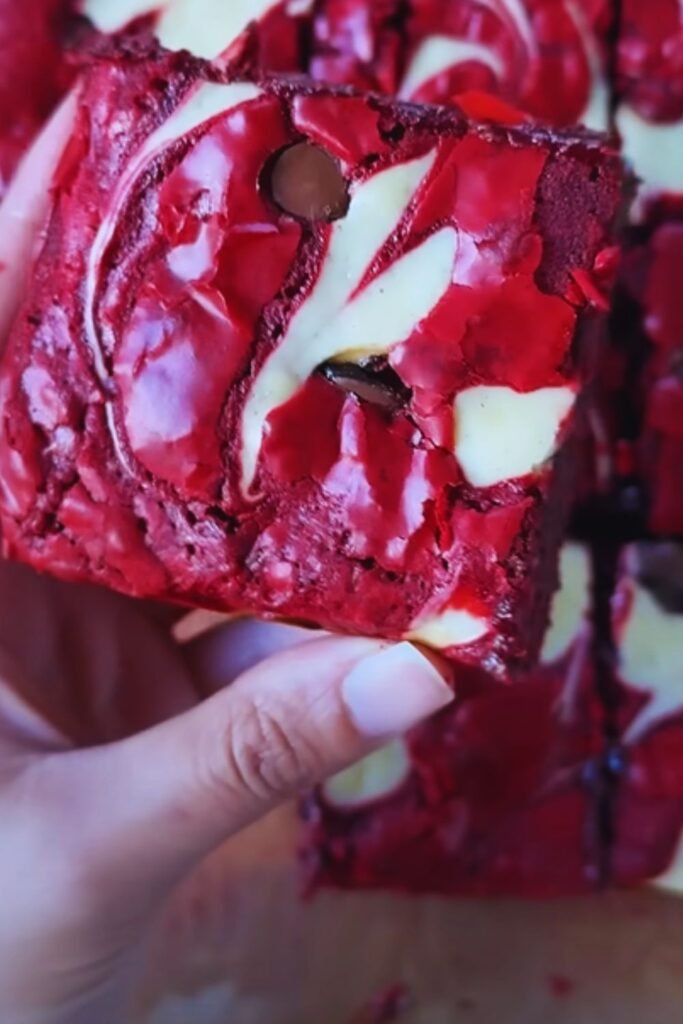
Have you ever found yourself craving something that combines the classic appeal of red velvet cake with the dense, fudgy texture of brownies? I certainly have, and that’s exactly why I developed this recipe for fudgy red velvet brownies. They’re decadent, visually stunning, and perfect for everything from casual gatherings to special occasions.
Why Red Velvet Brownies?
Red velvet has always held a special place in my heart. There’s something magical about that subtle cocoa flavor paired with the vibrant red color that makes any dessert feel extra special. When I first thought about combining the red velvet profile with brownies, I knew I was onto something extraordinary.
Traditional red velvet cake is wonderful, but sometimes you want something a bit more substantial and rich. These brownies deliver all the beloved flavor notes of red velvet but in a deliciously dense, fudgy format that’s impossible to resist.
The Secret to Perfect Fudgy Texture
Creating truly fudgy brownies requires understanding a few key principles. After numerous test batches (my friends didn’t complain about being taste testers!), I’ve discovered the perfect balance of ingredients:
- A higher fat-to-flour ratio keeps the brownies dense and moist
- Using both melted chocolate and cocoa powder creates depth of flavor
- Slightly underbaking ensures that irresistible fudgy center
- Chilling the brownies before slicing helps them set properly
- Using brown sugar alongside white sugar adds moisture and richness
Ingredients
For the Brownies:
- 1/2 cup (113g) unsalted butter
- 6 oz (170g) high-quality semi-sweet chocolate, chopped
- 1 cup (200g) granulated sugar
- 1/2 cup (100g) packed light brown sugar
- 3 large eggs, room temperature
- 2 teaspoons vanilla extract
- 1 tablespoon red food coloring (gel preferred)
- 1 tablespoon white vinegar
- 3/4 cup (95g) all-purpose flour
- 1/4 cup (25g) unsweetened cocoa powder (natural, not Dutch-processed)
- 1/2 teaspoon baking powder
- 1/4 teaspoon salt
For the Cream Cheese Frosting:
- 8 oz (225g) cream cheese, softened
- 1/4 cup (57g) unsalted butter, softened
- 2 cups (240g) powdered sugar, sifted
- 1 teaspoon vanilla extract
- Pinch of salt
Equipment Needed
- 9×9-inch (23×23 cm) baking pan
- Parchment paper
- Mixing bowls (medium and large)
- Electric mixer (stand or hand)
- Silicone spatula
- Whisk
- Measuring cups and spoons
- Cooling rack
- Offset spatula (for frosting)
Step-by-Step Instructions
Preparing the Pan and Oven
- Preheat your oven to 350°F (175°C).
- Line your 9×9-inch baking pan with parchment paper, leaving an overhang on two sides to easily lift the brownies out later.
- Lightly grease the parchment paper with butter or cooking spray.
Making the Brownie Batter
- In a medium microwave-safe bowl, combine the butter and chopped chocolate. Microwave in 30-second intervals, stirring between each, until completely melted and smooth. Allow to cool slightly.
- In a large mixing bowl, whisk together the granulated sugar, brown sugar, and the melted chocolate mixture until well combined.
- Add the eggs one at a time, whisking well after each addition until fully incorporated. The mixture should become smooth and glossy.
- Stir in the vanilla extract, red food coloring, and white vinegar. Mix until the batter is evenly colored. If using liquid food coloring rather than gel, you may need to add more to achieve the desired vibrant red color.
- In a separate bowl, whisk together the flour, cocoa powder, baking powder, and salt.
- Gently fold the dry ingredients into the wet ingredients, mixing just until combined and no dry streaks remain. Be careful not to overmix.
Baking the Brownies
- Pour the batter into the prepared pan, using a spatula to spread it evenly into the corners.
- Bake in the preheated oven for 25-30 minutes. For fudgy brownies, a toothpick inserted into the center should come out with a few moist crumbs attached, not completely clean.
- Remove from the oven and allow to cool completely in the pan on a wire rack. For even fudgier brownies, once they’ve cooled to room temperature, refrigerate them for at least 2 hours before frosting.
Making the Cream Cheese Frosting
- In a large bowl, beat the softened cream cheese and butter together until smooth and fluffy, about 2-3 minutes.
- Gradually add the sifted powdered sugar, mixing on low speed until incorporated, then increase to medium-high and beat until light and fluffy.
- Add the vanilla extract and a pinch of salt, then beat for another minute.
Frosting and Serving
- Once the brownies are completely cooled (and chilled if desired), use the parchment paper overhang to lift them out of the pan and onto a cutting board.
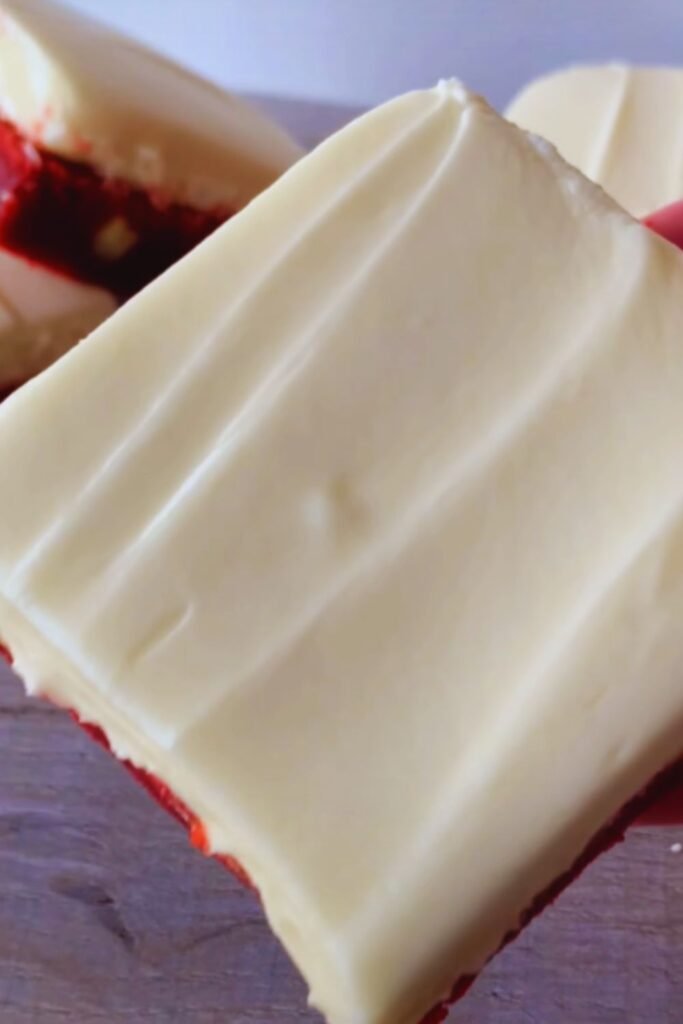
- Spread the cream cheese frosting evenly over the top of the brownies using an offset spatula.
- For cleaner cuts, refrigerate the frosted brownies for about 30 minutes before slicing.
- Cut into 16 squares (or smaller if you prefer), cleaning the knife between cuts for the neatest presentation.
Expert Tips for Success
After making these brownies countless times, I’ve gathered some invaluable tips that will ensure your red velvet brownies turn out perfectly every time:
- Room temperature ingredients: Make sure your eggs are at room temperature for better incorporation and a more even texture.
- Quality matters: Use high-quality chocolate and cocoa powder for the best flavor. The chocolate is a key component, so this isn’t the place to skimp.
- Don’t overmix: Once you add the dry ingredients, mix just until combined. Overmixing can lead to tough, cakey brownies instead of fudgy ones.
- The toothpick test: For fudgy brownies, the toothpick should come out with a few moist crumbs, not completely clean. If it comes out clean, they’re likely overbaked.
- Cooling completely: Patience is key! Allow the brownies to cool completely before frosting, otherwise the frosting will melt.
- Chilling before cutting: For the cleanest edges, refrigerate the brownies before cutting. A warm knife (run under hot water and dried) also helps create neat slices.
- Storage: Store in an airtight container in the refrigerator for up to 5 days. The flavor actually improves after a day as the flavors meld together.
Variations to Try
While the classic version is absolutely divine, I’ve experimented with several variations that are worth trying:
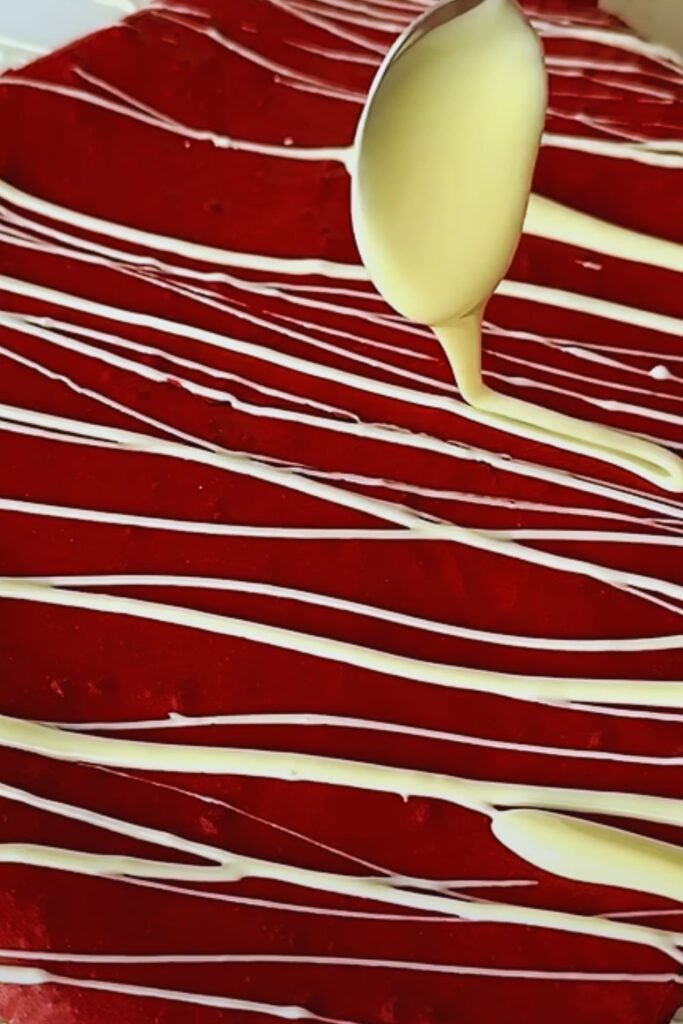
White Chocolate Swirl
Add a beautiful marble effect by mixing 4 oz of melted white chocolate with 2 tablespoons of the red velvet batter, then swirl it through the pan before baking.
Cheesecake Swirl
Create a simple cheesecake mixture (8 oz cream cheese, 1/4 cup sugar, 1 egg, 1/2 tsp vanilla) and swirl it through the brownie batter before baking for a gorgeous marbled effect with pockets of tangy cheesecake.
Chocolate Chip
Fold in 1/2 cup semi-sweet chocolate chips into the batter for extra chocolate pockets throughout the brownies.
Peppermint (Holiday Version)
Add 1/2 teaspoon of peppermint extract to the batter and sprinkle crushed candy canes on top of the frosting for a festive holiday treat.
Detailed Nutritional Information
For those who like to keep track of nutritional values, here’s a breakdown per serving (based on 16 brownies):
| Nutrient | Amount per Serving |
|---|---|
| Calories | 325 |
| Total Fat | 18g |
| Saturated Fat | 11g |
| Cholesterol | 75mg |
| Sodium | 135mg |
| Total Carbohydrates | 42g |
| Dietary Fiber | 1g |
| Sugars | 35g |
| Protein | 3g |
| Calcium | 25mg |
| Iron | 1mg |
Special Dietary Modifications
I understand that dietary restrictions shouldn’t mean missing out on delicious treats, so here are some tested modifications:
Gluten-Free Version
Replace the all-purpose flour with a 1:1 gluten-free flour blend. I recommend one that contains xanthan gum for the best texture.
Reduced Sugar
You can reduce the sugar by up to 25% without significantly affecting the texture. The brownies will be less sweet but still delicious.
Dairy-Free Option
Substitute the butter with coconut oil or a plant-based butter alternative, and use dairy-free cream cheese for the frosting.
Natural Coloring Alternative
If you prefer to avoid artificial food coloring, you can use 2 tablespoons of beet powder instead. The color won’t be quite as vibrant, but it will still have a lovely red hue.
Serving Suggestions
These red velvet brownies are wonderful on their own, but here are some serving ideas to make them even more special:
- Warm slightly and serve with a scoop of vanilla ice cream for an indulgent dessert
- Pair with fresh berries (strawberries or raspberries work beautifully) for a pop of color and freshness
- Dust with a light sprinkle of cocoa powder just before serving for an elegant touch
- Create a dessert platter with these brownies as the centerpiece, surrounded by chocolate-dipped strawberries
- Serve with a glass of cold milk or a hot cup of coffee to balance the sweetness
Make-Ahead and Storage Instructions
Make-Ahead Options:
- The brownies can be made up to 2 days in advance and stored unfrosted in an airtight container.
- The cream cheese frosting can be made 1 day ahead and refrigerated. Let it come to room temperature and re-whip briefly before spreading.
- Fully assembled frosted brownies can be made 1 day ahead and stored in the refrigerator.
Storage Guidelines:
- Unfrosted brownies can be stored at room temperature in an airtight container for up to 3 days.
- Frosted brownies should be refrigerated in an airtight container for up to 5 days.
- For longer storage, freeze unfrosted brownies for up to 3 months. Thaw overnight in the refrigerator before frosting and serving.
Freezing Instructions:
- Cut the brownies into squares (if desired) and place them on a baking sheet lined with parchment paper.
- Freeze until solid, about 2 hours.
- Wrap each brownie individually in plastic wrap, then place in a freezer-safe bag or container.
- Label with the date and freeze for up to 3 months.
- Thaw in the refrigerator overnight or at room temperature for about 2 hours before serving.
The Perfect Occasions
These red velvet brownies are versatile enough for any occasion, but they particularly shine at:
- Valentine’s Day celebrations (the red color is perfect!)
- Christmas gatherings (red is always festive)
- Birthday parties (especially for someone who loves red velvet)
- Bridal or baby showers
- Potlucks and bake sales (they always stand out on a dessert table)
- Anytime you want to impress with minimal effort
Troubleshooting Common Issues
Even experienced bakers encounter problems sometimes. Here’s how to solve the most common issues:
Brownies Too Cakey
- Possible cause: Too much flour or overmixing
- Solution: Measure flour carefully (preferably by weight) and mix just until combined
Brownies Too Gooey
- Possible cause: Underbaking
- Solution: Bake a few minutes longer; remember that brownies continue to set as they cool
Color Not Vibrant Enough
- Possible cause: Not enough food coloring or reaction with cocoa powder
- Solution: Use gel food coloring for more intense color, or add an additional 1/2 tablespoon
Frosting Too Runny
- Possible cause: Cream cheese or butter too warm
- Solution: Refrigerate the frosting for 15-20 minutes before spreading
Brownies Sticking to the Pan
- Possible cause: Inadequate pan preparation
- Solution: Always use parchment paper with overhanging edges and grease it lightly
Q&A Section
Q: Can I double this recipe for a larger batch? Yes, you can double the recipe and bake it in a 9×13-inch pan. Increase the baking time by about 5-10 minutes, but still use the toothpick test to determine when they’re done.
Q: Why do red velvet recipes call for vinegar? The vinegar serves two purposes: it reacts with the baking powder to help the brownies rise, and it brightens the red color by reacting with the cocoa powder.
Q: Can I use Dutch-processed cocoa instead of natural? I don’t recommend it for this recipe. Dutch-processed cocoa is neutralized and won’t react properly with the vinegar, which could affect both the texture and the color of your brownies.
Q: How do I know when brownies are done if I want them fudgy? Insert a toothpick into the center – it should come out with a few moist crumbs attached, not wet batter but not completely clean either. The edges should be set and the center should look slightly underdone.
Q: Can I make these without the red food coloring? Absolutely! Without the red food coloring, they’ll be chocolate brownies with a slight reddish-brown hue from the cocoa powder, but they’ll still be delicious.
Q: Why does my cream cheese frosting have lumps? This usually happens when the cream cheese isn’t soft enough. Make sure to let it come to room temperature for at least an hour before making the frosting.
Q: Can I add cream cheese to the brownie batter instead of making a frosting? Yes! You can create a cream cheese swirl by mixing 8 oz softened cream cheese with 1/4 cup sugar and 1 egg, then swirling it through the brownie batter before baking.
Q: How can I tell if my brownies are overbaked? Overbaked brownies will have a dry, cakey texture and the edges might pull away from the sides of the pan too much. A toothpick inserted in the center will come out completely clean with no crumbs.
Final Thoughts
My journey to perfect these red velvet brownies has been filled with delicious experiments and happy taste testers. What makes them special is the perfect balance between the subtle cocoa flavor, the vibrant red color, and the dense, fudgy texture that melts in your mouth.
Whether you’re a seasoned baker or trying your hand at brownies for the first time, this recipe is designed to bring you success and joy. The contrast between the rich, red brownie base and the tangy cream cheese frosting creates a dessert that’s not only visually stunning but also a perfect harmony of flavors.
So preheat that oven, gather your ingredients, and prepare to create a dessert that will have everyone asking for the recipe. And when they do, you can decide whether to share your new secret weapon for becoming the dessert hero at any gathering!
Happy baking!